


Preserved Lemon and Olive Bread
Martin shares another great recipe from the Big Book of Bread. Preserved Lemon and Olive Bread gets its incredible flavor and fragrance from DIY preserved lemons, which give you some of the character of traditional preserved lemons, including their bright acidity and brininess, in a fraction of the time. The combination of lemon and olives is a classic one that’s showcased brilliantly in this bread.
- I mean, we haven't made a sourdough in a while, right? I feel like it's been a little while. So let's make one today. This is one of my favorite sourdough breads from the "Big Book of Bread." It's preserved lemons with Kalamata olives. It's got a nice long process. It's a high-hydration dough. I'm gonna walk you through every step. And all that you need is right down there in the comments below so you can follow along. Let's make it.
Okay. So what I'm gonna do is I'm gonna slice this lemon into quarter-inch slices. about getting these into round slices. You can use any shape because before they go into the mix, we're gonna slice 'em up, okay? So don't be too finicky about that. So lemons into a bowl. And this is more than you're gonna need for this bread, but trust me that these are really good, like tossed with pasta, maybe a pasta that has some sausage and some of these preserved lemons in it. Very, very good. I've got one tablespoon of sugar and a teaspoon of salt. Toss those two combined just a little bit. And I'll let 'em rest for just a few minutes, and then I'll get 'em into my pot. Even in just a few minutes, some of that liquid is coming out and they're starting to soften a little bit, but we're gonna encourage them to become a little bit softer with a little bit of heat. See how that's thickening some. That's what I'm looking for. I just want to get a little bit syrupy. And I wanna see that these lemons are softening. As they cook, they get a little bit less bitter too. But this is one of the recipes that I often flag because I think this flavor combination is really super special. Lid on 'em. Let 'em cool overnight. Now, let's clean up here and we'll make our preferment. So we're gonna start with our water in the bowl. Water a little bit cool, 173 grams of water. A little bit on the cool side, because this is gonna rise for 12 to 16 hours. We don't want it to sort of outrun us. And so a little bit cool, always a good bet or often a good bet with preferments. And then I've got some sourdough culture here. This is nice and happy, it's bubbly. It looks real good. And I have about 29 grams of sourdough culture going in. So I'm gonna stir that to combine for just a second, just to disperse that culture. And then I'll add my flour, 289 grams of flour. And I'm gonna stir to combine. And what you're gonna notice pretty quickly is that this does not look like a normal sourdough levain. And when I say normal, what I mean by that is that most of the time when people are baking these days, they're using a liquid levain, right? It's a pancake batter consistency preferment, which is comprised of equal parts of flour and water by weight, right? It's kind of loose, it's soft. This on the other hand is a stiff levain. This is a stiff levain. So it's more like a dough consistency or even slightly firmer than dough consistency hydration. Then just to make sure that everything's homogenous and happy, I would dump it out onto the bench. I'm just kneading until I feel like it's sort of homogenous. I'm not looking for smooth here. We'd have to spend quite a bit of time for this to smooth out, and it's not really necessary. And maybe while I'm kneading I can take this opportunity to tell you that, as always, the recipe is right down there into the description. There's a Like button, you can smash that thing. You can become a subscriber to the channel where at least a couple times a month we're on here. So not completely smooth, but pretty smooth. Round it into a little bit of a ball. Pop that back in there. And then get a cover on it. And put it in a comfortable spot to rise for 12 to 16 hours. It'll have a nice long nap. And then we'll come back tomorrow and we're gonna make a gorgeous Olive-Lemon Sourdough Bread. We'll see ya when this thing is nice and healthy and happy. Okay, I'll be back. I'm ready. You ready? Good. Okay. So let's do the mix for this Preserved Lemon and Olive Bread. You already saw the preferment, and we have a nice active preferment here. Not a lot to say about that. Maybe I just break it open for a second and show you what that interior looks like. I find it interesting to sort of look inside and see this beautiful structure that we have inside the preferment. One of the nice things about a stiff preferment is that it has a really big window of sort of when it's ready to use. You know, if you mostly work with liquid preferment, sometimes, we're like, oh, it's at peak, or it's past peak, or it's still young, or whatever it is. The beauty of a stiff levain is that they move in a little bit more controlled fashion and so they have a nice big window when they're great to use. Okay, 470 grams. It's even more important in the sourdough environment to control dough temperature. And the way that we do that is through water temperature. So I'm just breaking up this stiff sourdough preferment. And when you do this, you may be like, eh, this is taken a little bit longer than I want. It still feels a little bit lumpy. I'm not looking for this to feel completely lump-free as it were. I'm just making sure that I don't have any big pieces in there, and what remains will sort of work its way out during the mix and through the folding process. Okay, clean my hand, back onto the scale. And I'm gonna get some flour in there, 371 grams. And someone out there is probably scratching their head like, wait a minute, Martin's making bread. Why is using all-purpose flour? Well, the reason is that this all-purpose is great for bread. I love all-purpose for lots and lots of breads, especially ones where I need a balance between sort of a bread that rises well and a bread that still has a tender crumb, right? I love all-purpose for baguettes, for example. I also love it in this bread. And then I'm gonna get some whole wheat in. This is 165 grams and whole wheat for flavor. Whole wheat also because supports a good rise, believe it or not. And then 13 grams of salt. And now I'm just gonna stir to combine. This is a relatively soft dough. I think this dough just off the top of my head is around maybe 78% hydration. So I would say, it is on the softer side. Early in this process, I'm gonna go to the sides of the bowl and I'm gonna clean it up. I'm gonna make sure that I don't have flour, which is hanging out up there, which should be part of my mix. And then I'm gonna switch to this process with the flexible scraper where I sort of scrape to the bottom of the bowl, lift up, and press. And a little bit of almost like a smearing fashion, 'cause in these early stages you're gonna have some lumps. It's not gonna be smooth or even homogenous. And so I'm just going from the bottom coming up until I feel like there are no dry spots. And now what I'm gonna do is I'm gonna knead it in the bowl a little bit. And I'm doing a couple things here. One, I'm adding a little bit of strength, but also I'm just feeling using my hands, sort of pinching and squeezing and pressing, just seeing if I have any densities or spots where I might have a little pocket of flour hanging out or a little piece of preferment hanging out that's not fully sort of incorporated. I'm gonna clean up the sides of the bowl slightly, take a wet hand and just run some water around it. And then what I can do is go back with my scraper, and it'll immediately clean up. And I'll tell you that this dough has no structure right now. Really, no structure. I'll even show you by pulling up a little bit of it and you can see that it just wants to tear apart. We're gonna set a timer for 20 minutes. We're gonna put the dough in a comfortable spot, and we'll do our first bowl fold. Okay, so let's give this bowl fold. It's been about 20 minutes. And same as it ever was. I'm just gonna go in, stretch from the outside, press into the middle. And I'm just sort of adding a little bit of additional strength to this dough. Still pretty soft, you know, it's a pretty soft dough, but it has gained some extensibility, and it looks like it's got a little bit more going on than it did initially. So I'm just gonna work my way around until it feels sort of a little bit tuggy. And then I'll get my cover back on. I'm gonna set a timer for another 20 minutes. And I'm gonna come back. And that's when we'll add in our inclusions, the olives and also the lemons. This is already moving. Amazing. Okay, you're filming, aren't you? All right. Hey, how are you? We're back. I'm here. It's Martin. So we're here for the second fold. First, I need to prepare these inclusions. Okay, so our inclusions, let's talk about those for a second. The lemons, boy, they smell so good. There's that bitterness. There's also all of that aromatic. This recipe makes a little bit more than what you're gonna need for this bread. I think that's good news. It means that you have some lemons kicking around that you could use in a pasta recipe. We have an On-Demand Pasta class where I use some lemon and you could use this in that case. Really, really good. Okay, so lemons, 55 grams. Did you say 58?
- 58.
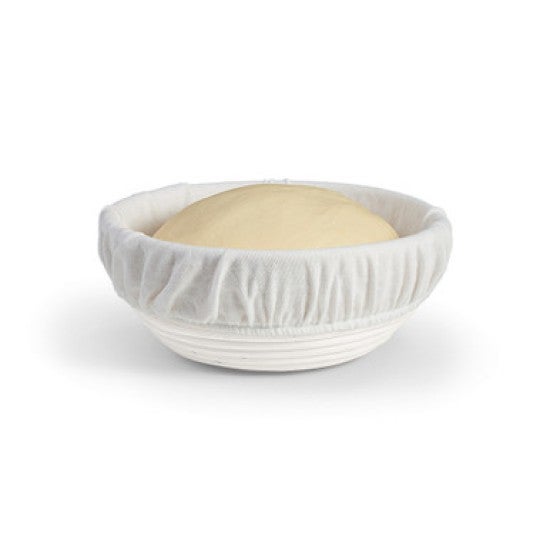
- 58. 58 grams of lemon. And then I'm gonna chop these a little bit just so that the lemon really infuses everything, right? I don't want big pieces that I sort of run across. So just give 'em a little bit of a chop chop. So beautiful lemon, beautiful olives. Just giving these a rough cut. And honestly, I may even see in a couple places where I have an olive that remains somewhat intact and that's okay. Okay, so let's get these inclusions into the dough. So I've got a little bit of activity starting here. It looks really beautiful. I'm just gonna make some dimples into the dough with my hands. Lemon and olives into the bowl. Whoop! And then I'm just gonna dimple 'em in. Sort of turning the bowl. And once I feel like they're in there a little bit, I might actually start sort of pinching the dough just a little bit, just sort of running my hands through it just to incorporate. And now, I'm going back, and I'm doing just a little bit of folding to sort of re-knit that network that I sort of messed up a little bit. And that looks good to me. A little bit of a cleanup. Okay. We'll be back in 20 minutes for the next fold. So been 20 minutes, and dough is moving well. Looks very good. A little bit jiggly, just a little bit jiggly. So let's give it another fold and see where we are here. Wet hand into the outside. Boy it feels good, starting to get some strength. When I pull up on it, it just gives me a little bit of resistance, which I really love. But it also feels wet, feels silky. It's exactly how a good hearth-baked artisan loaf should feel. I can see a little bit of the fleck of whole wheat in there. I don't have to get close to the to smell olives and lemons. So lid back on, another 20 minutes, we'll come back for our fourth and final fold. So happy nappy. See you in 20 or so, somewhere around there. Okay, fourth and final fold of the olive. And it looks really nice. It's definitely moving. It's jiggly. I even see some bubbles showing me some fermentation activity. It looks really good. Let's give one more fold here. So hand under stretching up. Boy, it feels nice. It feels supple, but at the same time I can feel that underneath that sort of ability to stretch is a little bit of tug, a little bit of resistance, which I really like. So 60 to 90 minutes, set it in a warm place to rise and then you're gonna come back for the divide. If the dough feels a little bit sluggish, or if life says that you have to run some errands and come back in two hours, that's okay. Leave the dough, the dough will be fine, we'll come back, we'll take care of things. Or maybe you've got nothing to do and you just want to get out that "Big Book of Bread" and figure out what you're gonna make for dessert. Okay, so it's been exactly one hour since we gave our last fold. Little bit of flour down on my bench and a little bit on top of the dough as well. And then I'll take a flexible scraper. And I'll just release it from the sides of the bowl. So what I'm gonna do is divide it into two pieces, then we will do a gentle preshape, these are nice big loaves, they're 900 grams each, which is substantial. So that's 900. So I'm gonna do a gentle preshape. And let me just give you a couple of quick sort of handling tips, right? The first one is make sure that you have a decent amount of flour down. I don't want to have, like, a pile of flour that I'm working in, but I do have a well-dusted surface to my bench, that's gonna help me, one. Number two, make sure that when you go to touch the dough that you're touching the sort of floured side. If the top side is a little bit sticky where maybe you've cut the dough during the divide, make sure that you're touching the floured side of the dough, okay? So this looks good. I'm ready to do the preshape. I'm gonna put a little bit of flour down on my board. This is where the dough are gonna rest for about 15 minutes after the divide. And I'm gonna do these in round preshapes. So I'm just gonna work my way around the dough mass, gently picking it up and sort of only with the pressure required to seal pressing it to the center of the mass. So I'm just gonna work my way around picking and sort of just laying it there. And if I need to, I can keep my thumb to hold that piece in place. And then once that's there, I'll pick it up, and I'll put it over here seam-side down. Seam-side down, seam-side up, that's your preference. I like seam-side down, so that's what I'm gonna do. Okay, so one more time. These will be okay to hang out for 15 minutes without something like a plastic lid or something similar to that. But I do recommend using a moist towel. And the reason for that is that I don't want them to dry out and form a skin during the brief preshape, sort of rest or brief rest after the preshape, okay? I gave this dough 15 minutes, and it feels like it is sort of recovering from the small amount of tension that I gave it, and it feels like it's ready to shape. So let's go over here. So I'm gonna transfer it over to my lightly floured work surface, and I have the seam-side up now. I don't know if you saw that, but like sleight of hand I flipped it as I came over here because I want the seams to be on the interior of the dough, okay? Now, before I go to the next step though, I should prepare my baskets. Don't let me forget that, right? So what I'm gonna do for the baskets is, I have these bannetons. These are round bannetons, and we've got a liner in there. We don't run the liners plain though. We run 'em with a little bit of flour. I've got a blend here of white and wheat flour. And that's what I'm gonna use to dust my baskets with. I like the blend because it represents the blends of flours or the blend of flours that I have in my dough. And using a sifter, I'm just going to dust the basket in a thorough manner, thorough but not super heavy, right? I'm preparing that so that the loaf doesn't just sit there after I've shaped it sticking to the bench or whatever. So in order to make the round, most of the work is exactly the same methodology or practice that I used for the preshape. So starting at the outside of the loaf, I stretch upward and press it to the middle, and you can get in there with your thumb and hold it to seal if you need to. I feel like this may not even need that. It's pretty well relaxed. And I'm just tensioning it a little bit as I make my way around. And that looks pretty good. And then I'll turn it over on the seam-side. And I'll just give it a little bit of extra tension just to feel how it is. And I think that's real nice. It's a soft dough, but I think it's good and ready to go. So let's get that into the basket. Might need just a little bit of flour on my hands. Pick it up. And then I'm gonna put it seam-side up into the basket. If you want, you can put a little dusting of flour on top. The reason for that is that if they were to rise a lot in the basket and touch the cover that I'm gonna put on there, they can stick. It's not entirely necessary. I like to cover my loaves at night when they go into the fridge. The reason that I like to use a cover is I guess twofold, one is that I don't like the bottom when it dries out. It actually ends up sort of getting hard, and then I'm just not crazy about that. But the other aspect, which is more important is that I cover it, and the loaves will stay warm for a little bit longer when I put 'em into the cold fridge for the overnight period, right? And so in that sense I get a little bit more rise out of them as opposed to cooling them down really quickly as they would if I put 'em in there without a cover on 'em, okay? And now I'm gonna leave 'em at room temperature for an hour. If you felt like during bulk fermentation the dough is a little bit sluggish, you could add some time here. You could go to an hour and a half or even two hours. My dough's been real healthy and happy as it's made its way through bulk fermentation. And so I'm gonna give it one hour at room temperature and then I'm gonna put it into a cold spot for the overnight rise. We'll be back tomorrow morning to bake these off for you. This is our beautiful Preserved Lemon and Olive Sourdough. Good morning. Good morning. Hello. Did you have a nice sleep? They look really good. They continued to move a little bit but not too much. You shouldn't see like a substantial rise in the fridge overnight. The cooling definitely slows the rate of rise down, almost to nothing. So I've got my oven preheated 475 degrees. I've got a stone in sort of the middle to lower portion of my oven. And I also have my steaming system in place. My preference here with these studio ovens, which are electric, is to have two cast iron pans or two pans of some sort that have some decent thermal mass in there, preheating with the stone or steel. Another option, especially, if you have a gas oven, I recommend using a covered baker. So if you have a Dutch oven, if you have a Brod & Taylor sort of cover that you can put on top of your loaves on the baking stone or steel. Let's get these onto my parchment here. I like to use the parchment. It's a way for me to load more sort of efficiently and cleanly. I don't have to worry about flubbing the load after a day and a half worth of work. It's heartbreaking. It's crushing when that happens. And so the parchment is my little bit of insurance here that makes sure that I can slide the loaves into the oven and place them exactly where I want them. I'm gonna flour the bottoms of these loaves, a little bit of whole wheat flour. I'm just gonna dust the bottoms that way. Once they're onto the parchment, if I need to manipulate 'em or shift them slightly, they will still move. Whereas if they're wet, and I put 'em on the parchment, they're adhered, and they're not really gonna be adjustable. And then I'm gonna invert them onto my parchment. Boop! And I'm gonna go with the other one. If it's easier for you, you can support that loaf with your hand and bring it out. And gently put it on there. And once that happens, the clock is ticking. I wanna get these into the oven quickly, right? And so I'm gonna go ahead and score lots of options for scoring. I'm just gonna give a single cut down the middle. Don't let the bread smell your fear, just go for it. Okay, let's get these in the oven. Boy, we've got some beautiful loaves out of the oven here. Just in terms of how the crust looks, it's got this beautiful burnished color. It's cracking in spots, which means that I steamed it well and that fermentation was good and everything sort of happened according to plan. I love these spots where the olives have migrated to the outside of the loaf during shaping or proofing or whatever else. Crust is substantial. Crumb is sort of moderately open, which is what I would expect with all of these inclusions. It's not a loaf where I'm looking for some sort of, like, wildly open crumb. Sometimes they call it, like, sauvage, like savage crumb in French. When you smell it, I've talked a little bit about the fact that it hits with this almost like panettone note to it. And it's because of all the citrus in here, the lemon really sort of blooms and perfumes. But then when you get a bite of it, you get this sort of, like, olive, savory quality, which is really, really nice. So thanks, everyone, for coming along. This is our Preserved Lemon and Olive Sourdough. This is from the "Big Book of Bread." And this is Martin and Tucker and Kat in the studio today saying, thanks for joining us.

Video Credits
Shop this video

Related Videos


Your bread fell flat. Your cookies crumbled. Who do you turn to?